The Step-by-Step Guide to the Perfect Messy Bun
There is honestly no hairstyle more beloved or more useful than the humble messy bun. This step by step guide to the perfect messy bun is here to help you finally master that effortlessly chic look we all envy. Trust me, once you get the hang of it, you will reach for this style again and again.
What makes the messy bun so wonderful is that imperfection is the whole point. Unlike a sleek bun that demands precision, this one actually looks better when it is a little undone. So you can stop stressing about getting every strand perfect.
In this guide, I will walk you through the entire process one easy step at a time. So whether you have long locks, short hair, or something in between, you are about to nail this timeless look.
Why Everyone Loves the Messy Bun

Before we dive in, let us talk about why this style is such a classic. The messy bun strikes that magical balance between casual and put together. So it works for almost any occasion, from lazy Sundays to busy work days.
It is also incredibly practical for real life. It keeps your hair off your face, survives a workout, and hides unwashed roots beautifully. As a result, it is the go to style for anyone living a busy, on the move life.
Best of all, it suits nearly everyone regardless of hair type or age. You can dress it up or down depending on your mood. So it is no wonder this look never goes out of style.
Prep Your Hair First
The secret to a great messy bun actually starts before you touch a hair tie. A little prep makes the whole process smoother and the result far better. So do not skip this important first step.
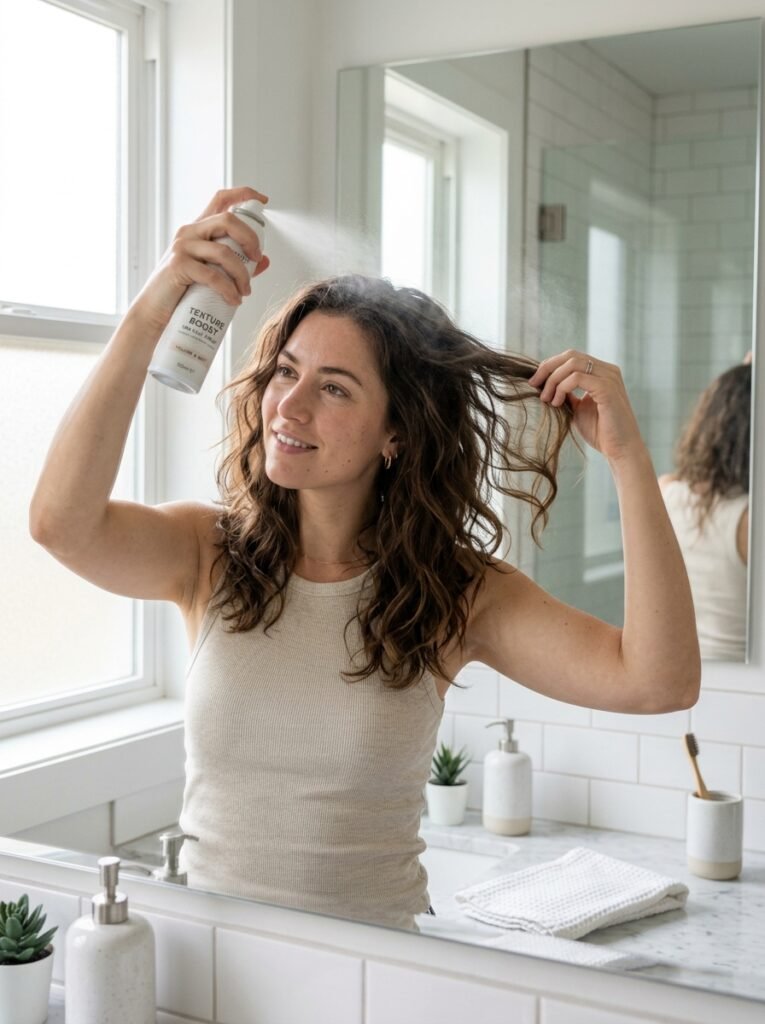
Interestingly, the messy bun looks best on second day hair rather than freshly washed locks. Clean hair can be too slippery and silky to hold a bun in place. As a result, slightly textured hair grips better and stays put.
If your hair is freshly washed, do not worry at all. Just spritz in some dry shampoo or texturizing spray to add grip. So you can fake that perfect lived in texture in seconds.
Gather the Right Tools
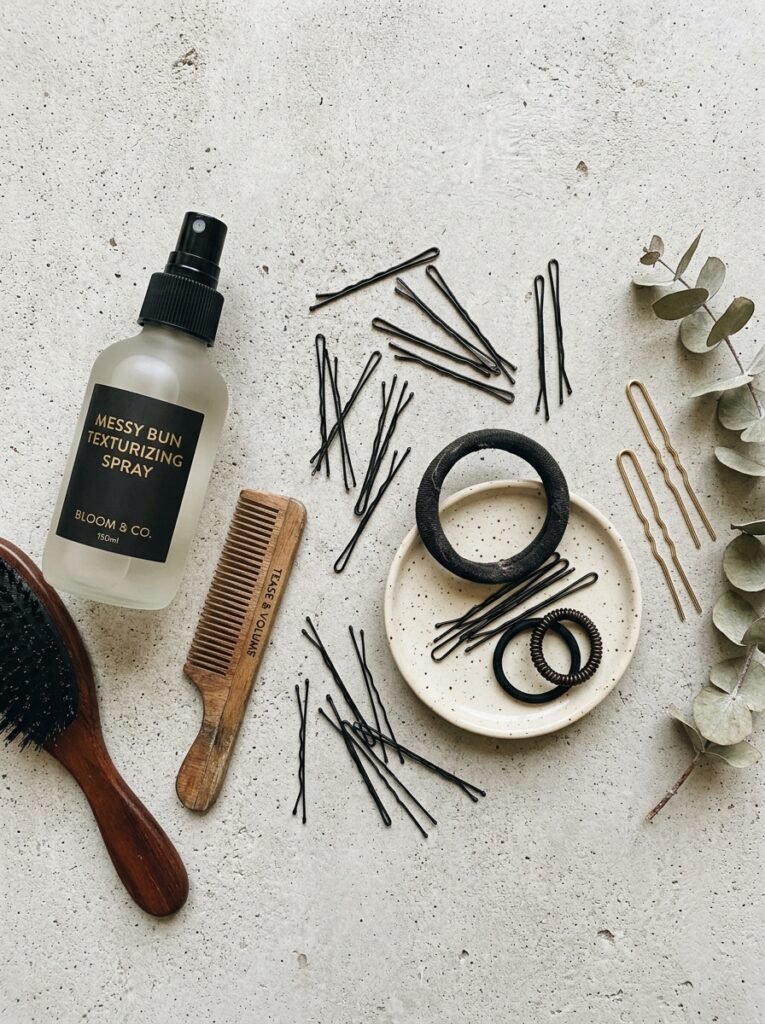
You really do not need much to create the perfect messy bun. Having a few simple tools on hand makes everything easier though. So gather your supplies before you begin.
The essentials are a good hair tie, a handful of bobby pins, and your fingers. A texturizing spray or dry shampoo helps too, as we just covered. As a result, you will have everything ready without scrambling mid style.
You can skip the brush if you want extra messiness, which is part of the charm. Using your fingers instead keeps that natural, undone texture. So this is genuinely one of the lowest effort styles out there.
Decide on Your Bun Placement
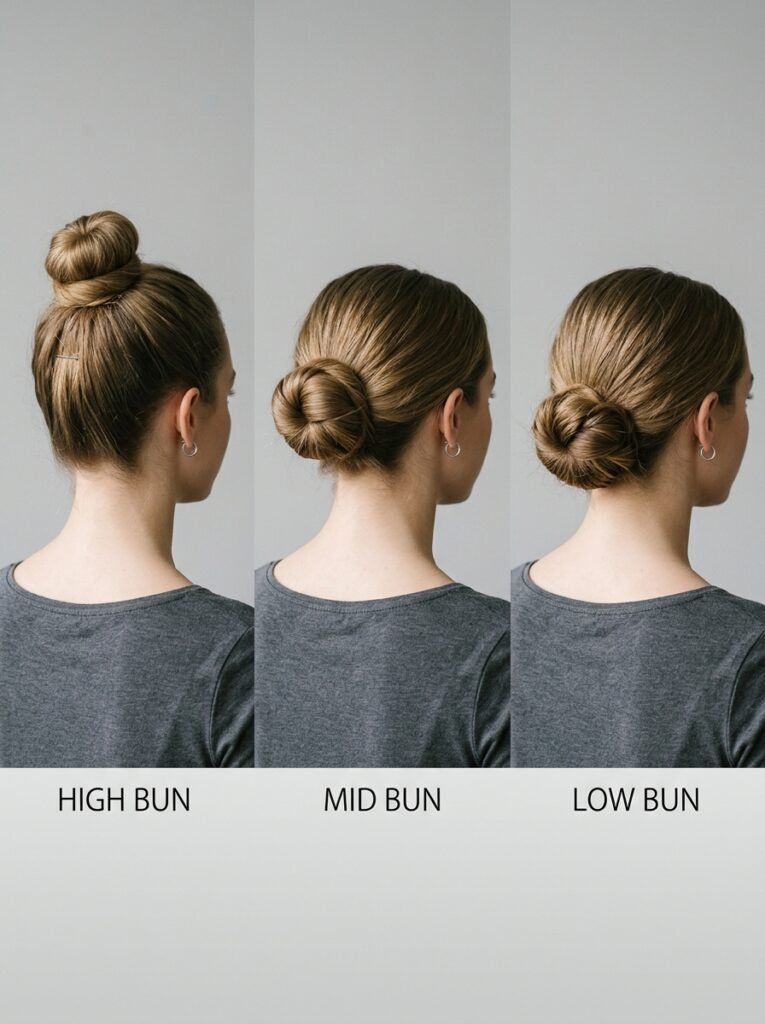
Where you place your bun completely changes the vibe of the look. So take a quick moment to decide before you start gathering your hair. This little choice makes a surprising difference.
A high bun sits at the crown and feels playful, youthful, and fun. A low bun rests at the nape of your neck and reads as softer and more elegant. Meanwhile, a mid placement gives you a relaxed everyday feel.
There is no wrong answer here, so go with whatever suits your mood. Consider your outfit and the occasion as you decide. As a result, your bun will perfectly match the look you are going for.
Gather and Secure Your Hair
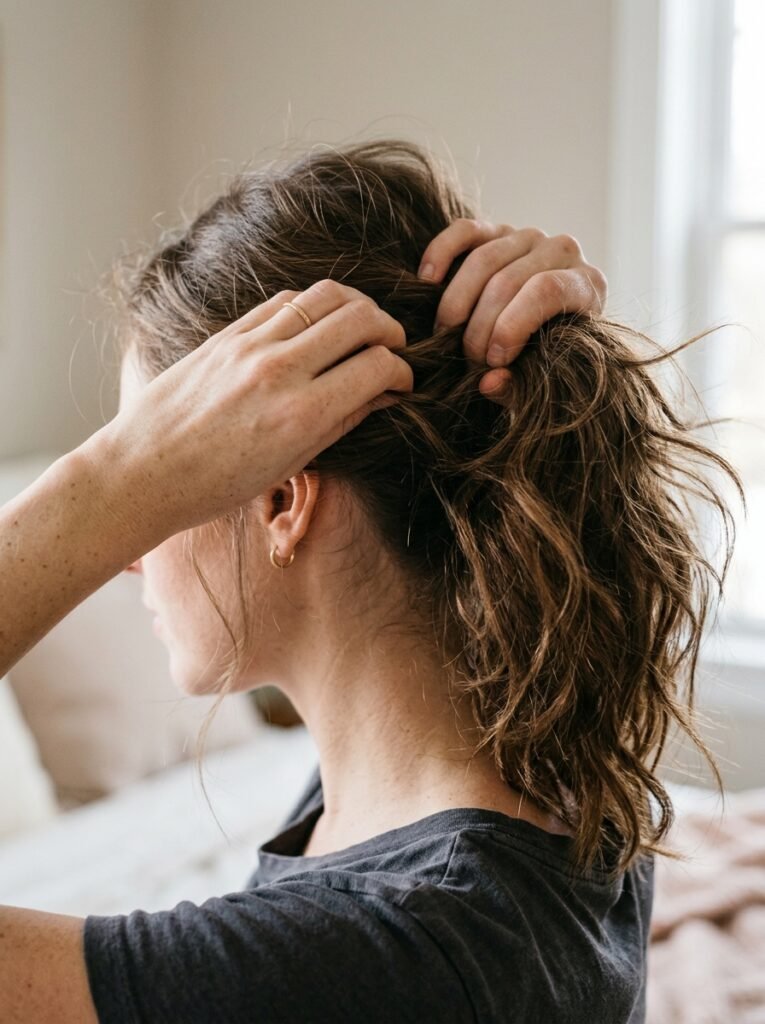
Now we get to the heart of this step by step guide to the perfect messy bun. Start by gathering your hair into a ponytail at your chosen placement. So sweep it up using your fingers rather than a brush for that natural texture.
Do not aim for a sleek, perfect ponytail at this stage. Leaving a few loose pieces around your face is exactly what you want. As a result, the finished bun will look soft and effortless.
Once gathered, secure your ponytail with a hair tie. On your final loop through the tie, only pull your hair halfway to create a little loop. So you end up with a half ponytail that forms the base of your bun.
Twist and Wrap
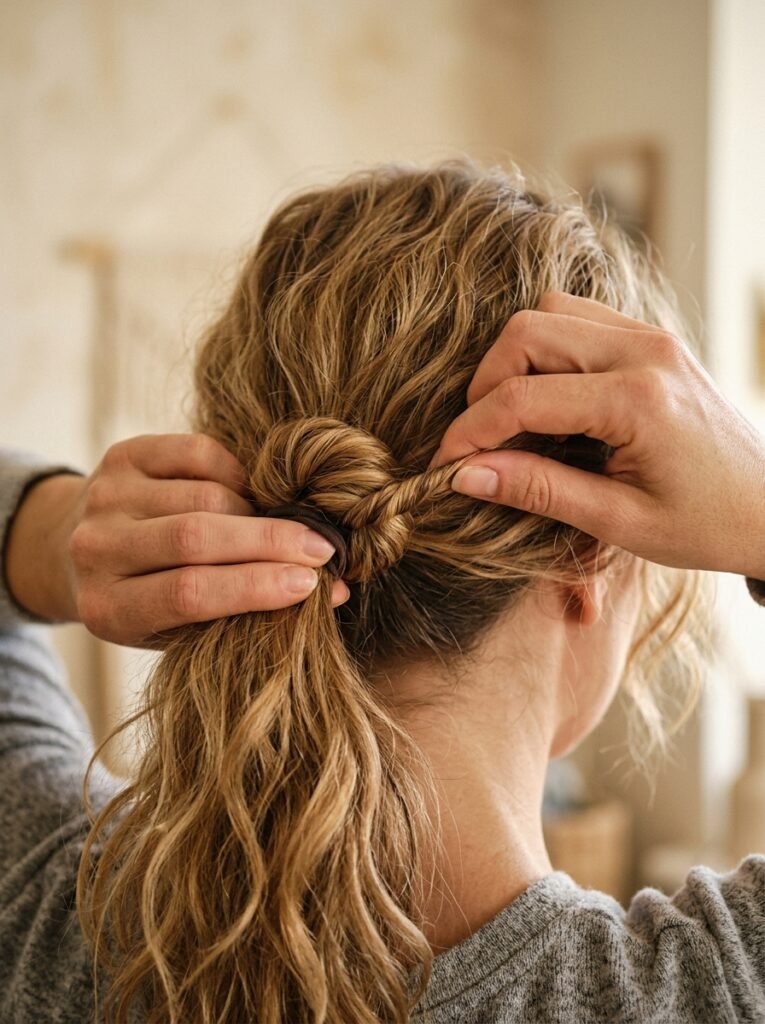
With your base in place, it is time to shape the actual bun. Take the loose tail of hair and twist it gently. So you create a soft rope that you can wrap into shape.
Wrap this twisted section around the base of your ponytail. Keep it loose and relaxed rather than tight and neat. As a result, you build that effortlessly tousled bun shape we are after.
Do not fuss over making it perfectly round or even. A slightly lopsided, organic shape is exactly the goal here. So embrace the imperfection as you wrap.
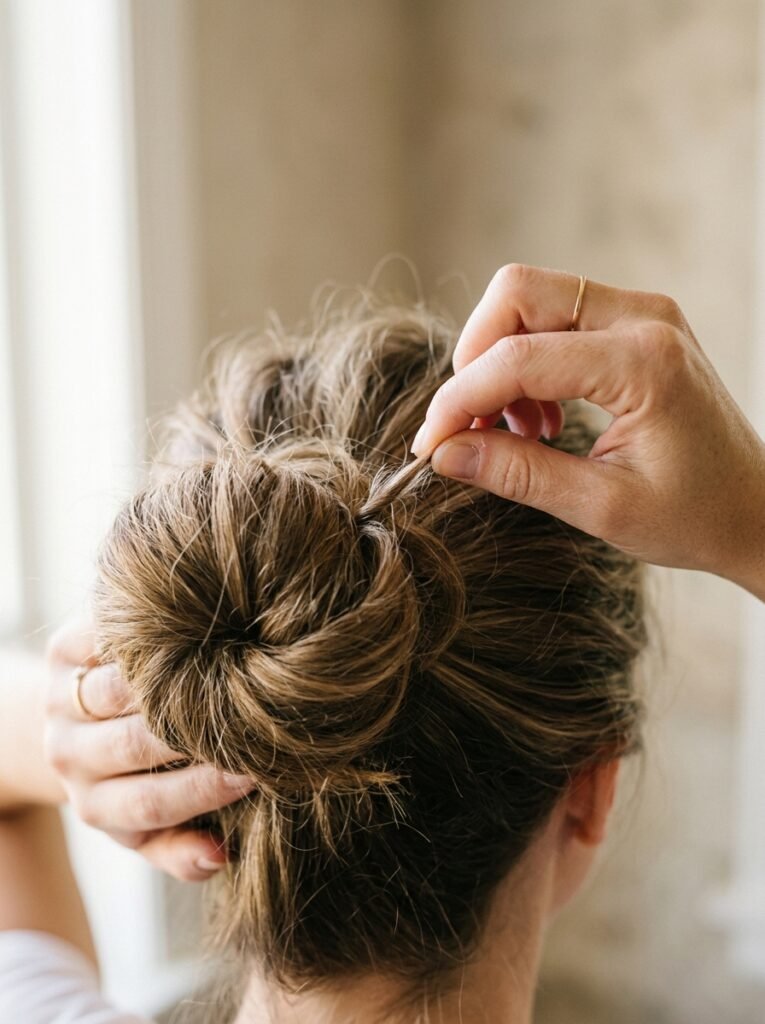
Pin Everything in Place
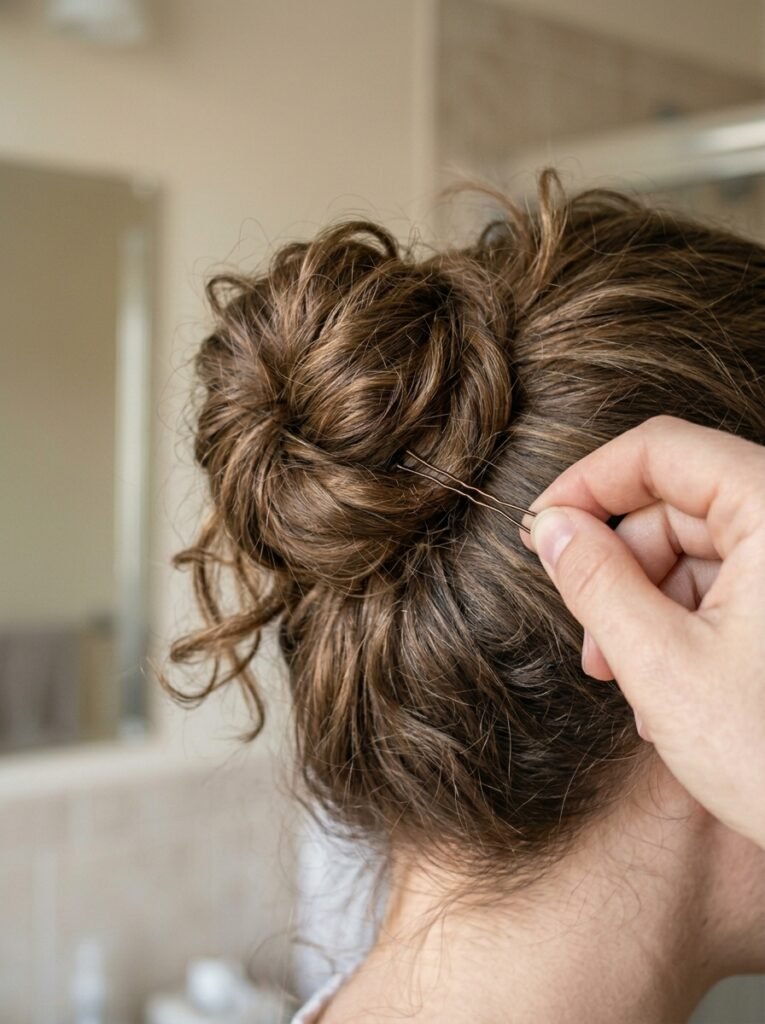
Once your bun is shaped, you need to secure it so it lasts all day. This is where those trusty bobby pins come into play. So tuck and pin the loose ends to hold everything together.
Slide your bobby pins in at angles around the bun for the best hold. Aim to hide them underneath the hair so they stay invisible. As a result, your bun stays put without any obvious hardware showing.
Use as many or as few pins as you need depending on your hair. Thicker hair often needs a few more to feel secure. So adjust until your bun feels comfortable and stable.
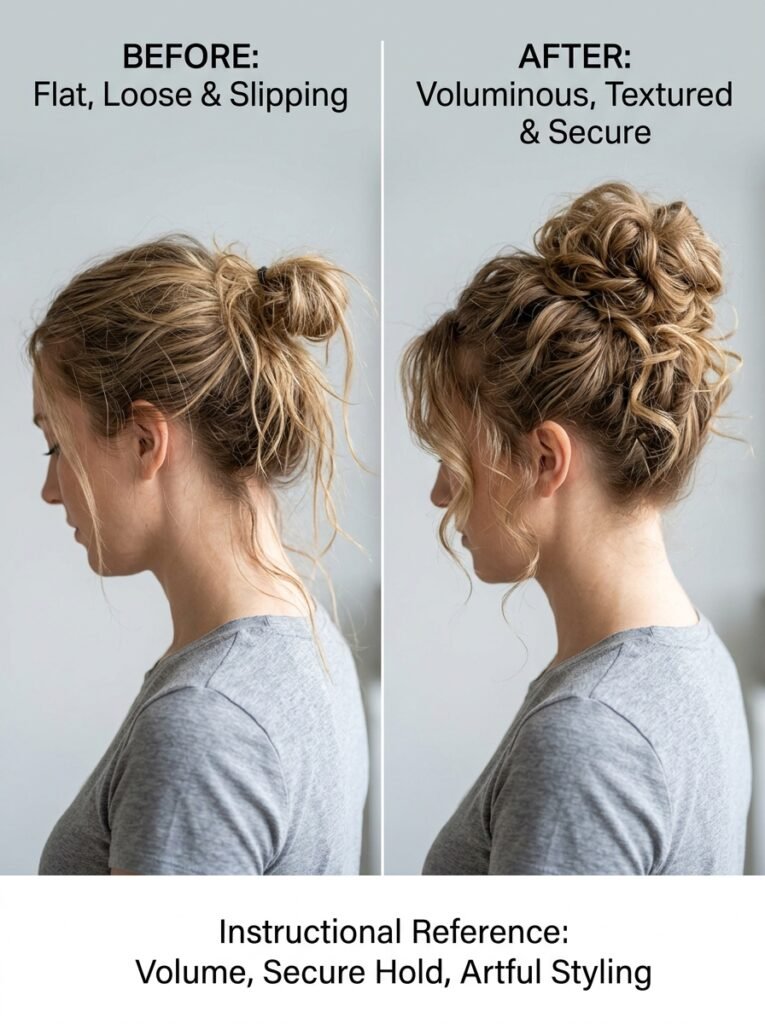
Pull and Loosen for Texture
Here comes the fun part that truly makes it a messy bun. Now you get to gently pull and loosen things to create that perfect undone look. So this is where the magic really happens.
Gently tug at small sections of the bun to puff it out a little. Loosen the hair around your crown too for added volume and softness. As a result, your bun looks fuller, softer, and beautifully imperfect.
Be gentle so you do not pull the whole thing loose, of course. A little tugging goes a long way here. So take it slow until you reach that ideal relaxed shape.
Frame Your Face

A truly flattering messy bun is all about those soft face framing pieces. So pull out a few strands around your face to soften the whole look. This simple touch makes a huge difference.
Tug loose a couple of pieces at the front and around your ears. If you have layers or bangs, let them fall naturally too. As a result, your face is gently framed and the style looks far more polished.
You can leave these pieces straight or add a quick curl for extra charm. A little wave around the face feels especially romantic. So this small step really elevates the entire look.
Set It in Place
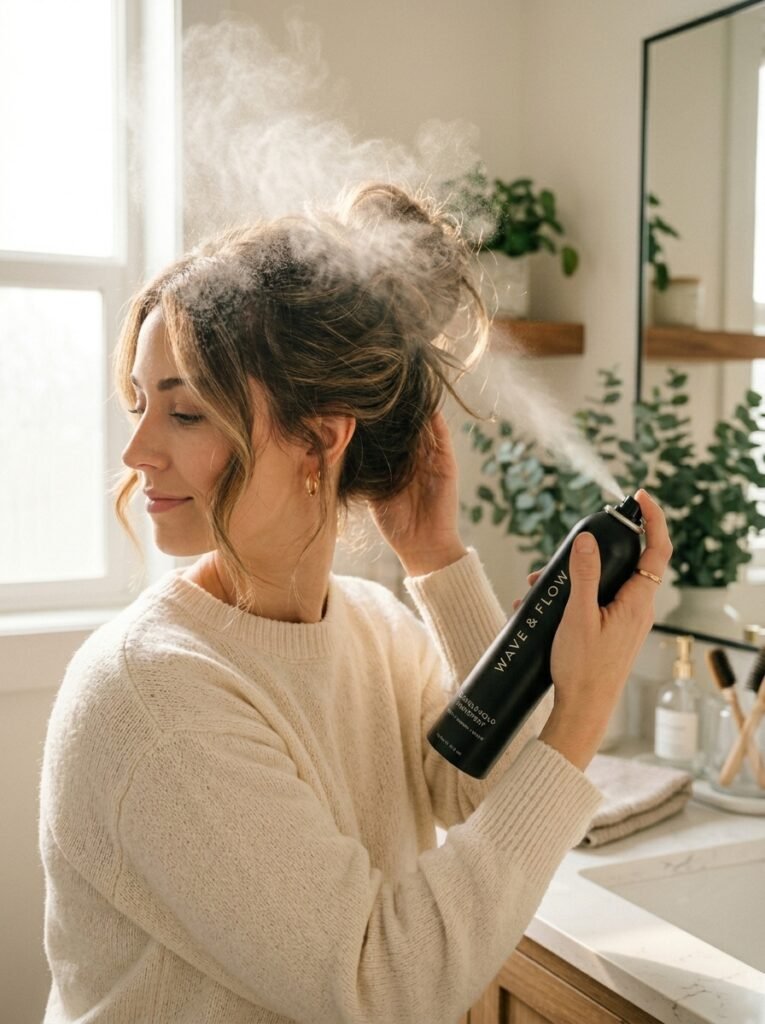
You are almost done, but a final setting step keeps your bun looking great. So a quick mist of hairspray locks everything in beautifully. This ensures your hard work lasts throughout the day.
Lightly spray over the bun and those face framing pieces. Choose a flexible hold spray so your hair still moves naturally. As a result, your messy bun stays soft rather than stiff and crunchy.
If you skipped hairspray, a touch more dry shampoo helps too. It adds grip and keeps flyaways in check. So your bun stays fresh looking for hours.
Adapt It for Different Hair Types
One of the best things about this style is how adaptable it is. Different hair types can all rock a messy bun with a few small tweaks. So let me share some quick tips for your particular hair.
If you have fine hair, add lots of texturizing product for grip and volume. For thick hair, you may want a stronger tie and extra pins to hold it. As a result, your bun will work no matter what your hair is like.
Curly haired friends can absolutely join in too. Just embrace your natural texture and gather your curls loosely. So the messy bun truly is a style for everyone.
Troubleshooting Common Problems
Sometimes a messy bun does not cooperate, and that is perfectly normal. Knowing a few quick fixes saves you from frustration. So let me cover the most common little hiccups.
If your bun keeps falling out, your hair may be too clean and slippery. Adding texture spray or dry shampoo usually solves this instantly. Meanwhile, if it looks too neat, simply pull a few more pieces loose.
If your bun feels too heavy or droopy, try moving it higher. A higher placement often feels more secure and lifted. So a few small adjustments fix almost any problem.
Final Thoughts
When you put it all together, this step by step guide to the perfect messy bun proves how simple great hair can be. With a little prep, a few twists, and some gentle tugging, you can nail this look every time. So there is no need to feel intimidated by it ever again.
My honest advice is to practice a few times on a relaxed day. The more you do it, the more natural and quick it becomes. Before long, you will whip up a gorgeous messy bun without even thinking.
Remember that imperfection is the whole point of this style. So stop chasing flawless and embrace that beautifully undone charm. Trust me, the messy bun is meant to feel easy, fun, and uniquely you.
Frequently Asked Questions
Is a messy bun better on clean or dirty hair? Slightly dirty or second day hair actually works best. Clean hair can be too slippery to hold the bun securely. So a little texture from dry shampoo or product really helps.
How do I make my messy bun look fuller? The trick is to gently pull and loosen the bun once it is pinned. Tug out small sections to puff it up and add volume. Texturizing product beforehand also helps thinner hair look fuller.
Why does my messy bun keep falling out? Usually it is because your hair is too clean and slippery. Adding texture spray or dry shampoo gives your hair more grip. Using enough bobby pins at the right angles also keeps it secure.
Can I do a messy bun with short hair? Yes, though you may need a few extra bobby pins. Shorter hair works best with a lower, smaller bun. Just pin any loose pieces and embrace a slightly tinier, softer shape.
What tools do I need for a messy bun? You need very little, which is part of the appeal. A hair tie, some bobby pins, and your fingers are the essentials. A texturizing spray or dry shampoo is a helpful bonus too.